- Screenshot Basics: A Guide on How to Take a Screenshot on Lenovo Laptop
- How to Take a Screenshot on Lenovo Laptop
- Keyboard Shortcuts for Taking Screenshots
- Using the Snipping Tool for More Sophisticated Captures
- Third-Party Programs for Enhanced Features
- Tips & Tricks for Better Screenshots
- Conclusion: Easy Way to Capture Your Screen on your Lenovo
- Lenovo Screenshot FAQs
Screenshot Basics: A Guide on How to Take a Screenshot on Lenovo Laptop
Taking a screenshot is a great skill in today’s digital world. It isn’t that hard, but if you don’t know how to do it, you might be irritated when you need to quickly take a picture of whats on your screen and fumble around, only to miss the picture you wanted.
Whether you’re making an online purchase, taking notes from a lecture, or sharing your favorite meme, screenshots are simple and useful tools that help us capture digital moments. Here is how to take a screenshot of the popular Lenovo laptop.
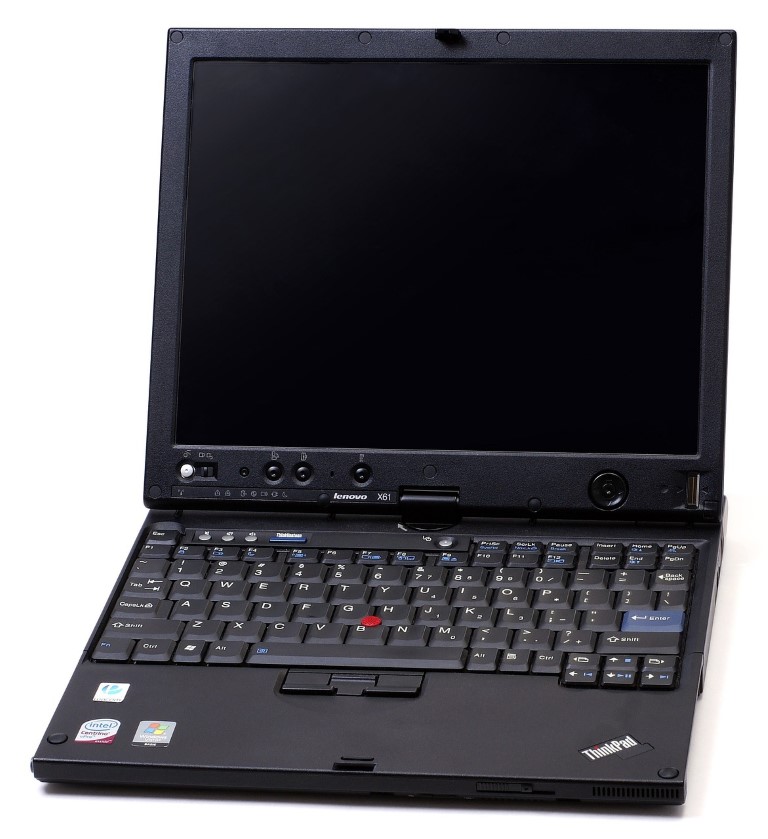
First, locate the Print Screen key on your keyboard. It is usually located above the Insert key and below the F12 key. Press this button, and it will take a screenshot of whatever is currently displayed on your screen. The image will be saved as part of your clipboard, which can be accessed later by pasting it into any program such as Paint or Word documents.
How to Take a Screenshot on Lenovo Laptop
Taking a screenshot on your Lenovo laptop is easier than you might think. Whether it’s to capture an image of something you’re working on or just to share something with friends and family, screenshots are a great way to capture information quickly. Here are some simple steps that will help you take a screenshot on your Lenovo laptop in just a few minutes:
First, ensure the screen displays exactly what you want to capture. Then press the Print Screen button (PrtSc) located at the top right corner of your keyboard. This will save the entire screen as an image on your computer clipboard. You can paste this into any photo editor for further editing or saving. If you’re running Windows 10, pressing Windows + PrtSc simultaneously will save a screenshot directly as an image file in the Pictures > Screenshots folder without further editing or saving.
Keyboard Shortcuts for Taking Screenshots
Are you looking for a quick and easy way to take screenshots on your Lenovo laptop? Keyboard shortcuts are an efficient tool that can help you capture important information on your computer screen and save it directly to a file. In this article, we’ll discuss some common keyboard shortcuts for taking screenshots on Lenovo laptops.
With these tools, you can quickly capture images of anything showing up on your screen in just a few steps. We’ll also explain how to use the Windows Snipping Tool, which captures specific screen parts without worrying about cropping or editing later. By the end of this article, you should have all the knowledge needed to start taking screenshots like a pro!
Using the Snipping Tool for More Sophisticated Captures
Taking a screenshot on your Lenovo laptop can be useful for many purposes, such as creating visual instructions, capturing information from the web, or simply grabbing an image of something you want to remember. The snipping tool is a computer program that lets you capture specific areas of your screen more accurately than ever before. It’s a great way to take more sophisticated captures quickly and easily.

Using the snipping tool on your Lenovo laptop is very straightforward and user-friendly. All you have to do is open it up by typing ‘Snip & Sketch’ into the start menu search bar and selecting it when it comes up in the results. You’ll then be able to choose between four different modes: free-form, rectangular, window, or full-screen mode, depending on which type of capture you’re looking for.
Third-Party Programs for Enhanced Features
Third-party programs are often overlooked when it comes to enhancing the features of a laptop. However, they can be incredibly useful for unlocking extra capabilities and customizing your Lenovo laptop. For example, if you want to take a screenshot on a Lenovo laptop but don’t know how there’s no need to worry – third-party screenshot programs can provide an easy way to capture images on your device.
These programs offer users greater control over their screenshots than just basic keyboard shortcuts, with available features like annotating and resizing. Furthermore, these tools are free or low cost, making them ideal for anyone looking to make their laptop experience easier or more efficient. So if you’re looking for an effective solution for taking screenshots on your Lenovo laptop, consider downloading one of the many third-party screenshot tools available online.
Tips & Tricks for Better Screenshots
Capturing screenshots is a great way to save images and other visual data. Screenshots are used for everything from sharing content with friends to creating tutorials. Taking a screenshot on a Lenovo laptop can be done in just a few steps! Here are some tips and tricks to help you take better screenshots on your Lenovo laptop:
First, familiarize yourself with the many shortcuts available. You can use these shortcuts to quickly capture whatever image you’re trying to save, such as Windows + PrtScn or Fn + PrtScn. Knowing where certain buttons are located on your keyboard will also make taking screenshots easier and faster. Additionally, if your Lenovo laptop has the ability for multiple screens, try using this feature before capturing an image so that you get the most accurate picture possible.
Finally, don’t forget about editing tools!

Conclusion: Easy Way to Capture Your Screen on your Lenovo
Whether you need to capture an image quickly or make a tutorial video, capturing your Lenovo laptop’s screen is easy. In this article, we’ve discussed how to take screenshots on various Windows and Mac systems.
For quick captures without additional tools, if you’re running Windows 10 or 8, press the “Windows + Print Screen” buttons simultaneously. Your screen will be captured and stored in the Pictures/Screenshots folder. If you’re running Mac OS X El Capitan or later versions, press “Command + Shift + 3” keys together to capture your entire screen or “Command + Shift + 4” keys to select a particular area of the screen for capture.
We hope this article provided clear instructions on how to take a screenshot on a Lenovo laptop so that users can easily save their work and share it with others as needed.
Lenovo Screenshot FAQs
To take a screenshot with your Lenovo, you can press the “Print Screen” button on your keyboard, or you can use the “Windows + Shift + S” keyboard shortcut.
To take a screenshot on a Lenovo laptop without the Print Screen button, you can use the “Windows + Shift + S” keyboard shortcut, or you can use the built-in Snipping Tool.
To capture a screenshot on any laptop, you can use the “Print Screen” button on your keyboard, or you can use the “Windows + Shift + S” keyboard shortcut.
To use Lenovo Snip to take a screenshot, you can launch the Snipping Tool and select the “New” button to start a new screenshot.
To take a screenshot using a different method, you can use the built-in Snipping Tool, or you can download and use a third-party screenshot tool.
To screenshot on a Lenovo laptop using Google Chrome, you can use the “Windows + Shift + S” keyboard shortcut, or you can use the built-in Snipping Tool.
By default, screenshots taken on a Lenovo laptop are saved in the “Screenshots” folder, which is located in the “Pictures” folder.
The shortcut key for taking a screenshot on a laptop is typically the “Print Screen” button on the keyboard.
To take a screenshot without clicking, you can use the “Windows + Shift + S” keyboard shortcut, or you can use the built-in Snipping Tool.
To take a screenshot on a laptop without the PrtScn and FN keys, you can use the “Windows + Shift + S” keyboard shortcut, or you can use the built-in Snipping Tool.

